Google Analytics offers a wealth of information about your website traffic. If you’re setting it up for the first time, please take a look at my previous post the Beginners Guide to Google Analytics. If you’re all set up and ready to take your Google Analytics to the next level, read on!
Why Use Filters with Google Analytics?
Google does a great job of capturing traffic that comes to your website. In some instances, you might think that it does TOO great of a job. How can that be?
Simple. By default, Google Analytics shows you every bit of traffic that comes to your website, relevant and not. That’s a lot of data!
Consider this – if you base your business decisions on the web traffic that Google Analytics reports, you want that data to be as clean as possible and not skewed by false indicators. To ensure that your data is pure, you can create filters to block irrelevant traffic from cluttering your reports.
A prime example of this is the internal traffic filter, which is used to omit any references to traffic generated from within your own organization to your website. It’s common for internal users to test features added to the site, and Google will count this traffic as legitimate in its reports unless you filter it out.
How to Create Filters in Google Analytics
Google makes it easy to create filters, using a combination of predefined and custom templates. Predefined filters can be created to include or exclude web traffic originating from:
- ISP domains
- IP addresses
Predefined filters can also be created to include or exclude web traffic destined to:
- Subdirectories
- Hostnames
Custom filters allow considerably more fine-tuning of what web traffic will appear on your reports. For most users, the predefined templates should be sufficient.
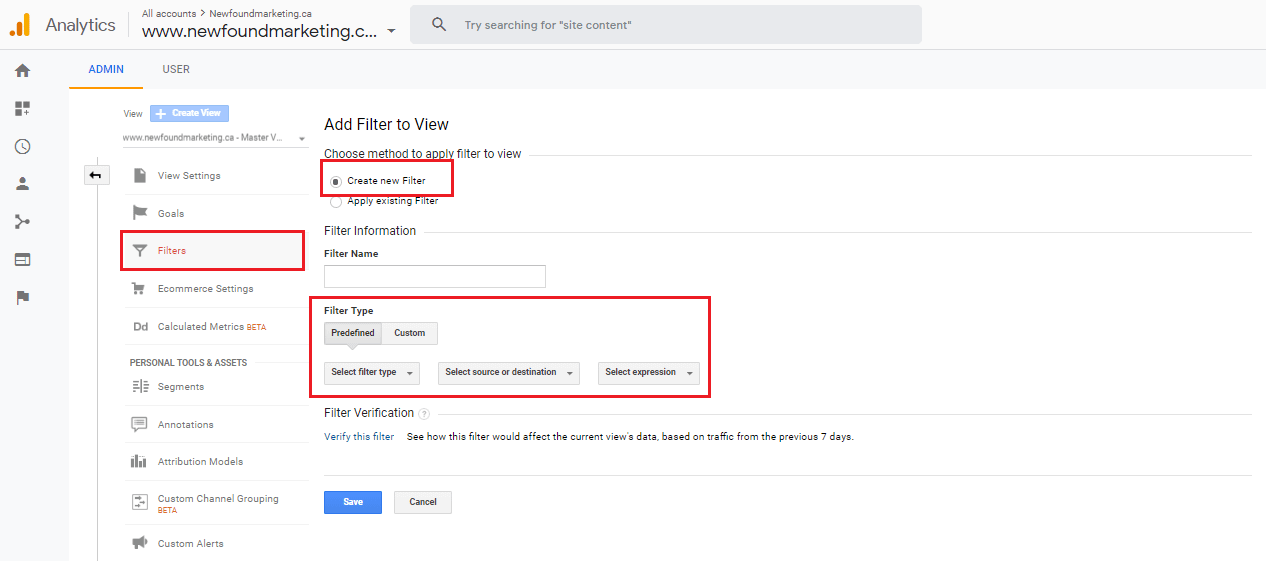
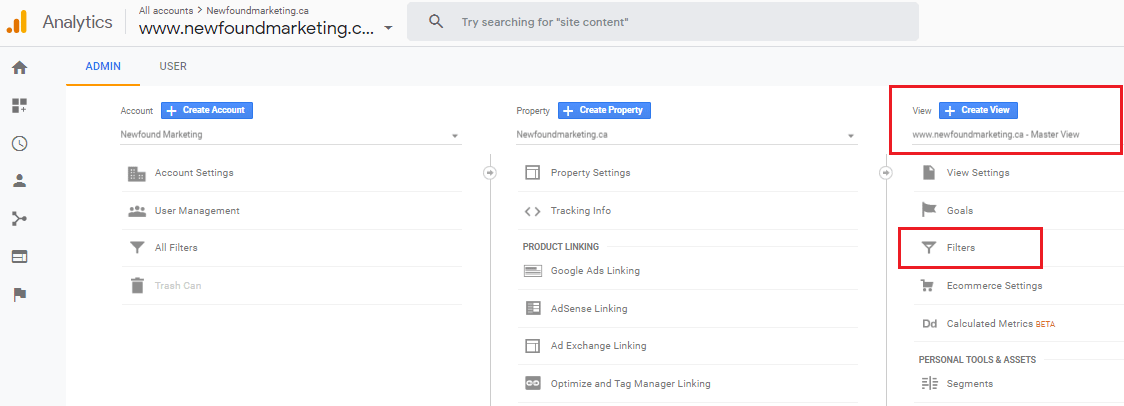
To create a filter, simply go to your Admin section in your Google Analytics dashboard, click Filters and Add Filter. The Create New Filter button should be selected by default. The first thing will be to give your filter an easily identifiable name. After that, select predefined or custom, then set each box to define the specific filter.
Once a filter has been created, save it and continue the process until all desired filters are listed. You can apply them each to a view as you make them, but it is probably easier to create all your filters first, and then apply them to views afterward.
Now that we have a general idea of how to create filters, let’s look at some specific examples of commonly used Google Analytics filters.
Common Google Analytics Filters
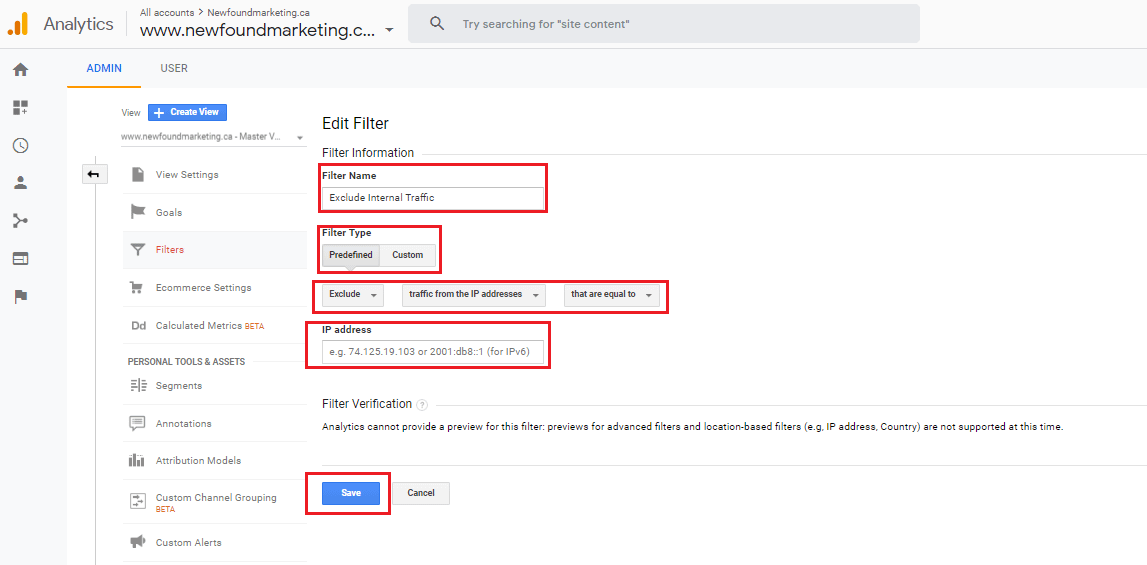
Exclude Internal Traffic
As we mentioned above, any visits to your website from within your organization (or even from yourself, at home) are going to be counted by Google, and be reflected in your analytics reports. If you are using these reports to make business decisions, those reports are going to show inflated numbers. The best way to eliminate internal traffic from showing up is to create an Internal Traffic filter.
Using the method outlined above, select the following path:
- Admin -> Filters -> Add Filter -> Give it an easily identifiable name -> Predefined -> Exclude ->Traffic from the IP addresses -> That are equal to -> Your organization’s IP address (The simplest way to locate your public IP address is to type “What is my IP address” into Google, and it will return an address to you.)
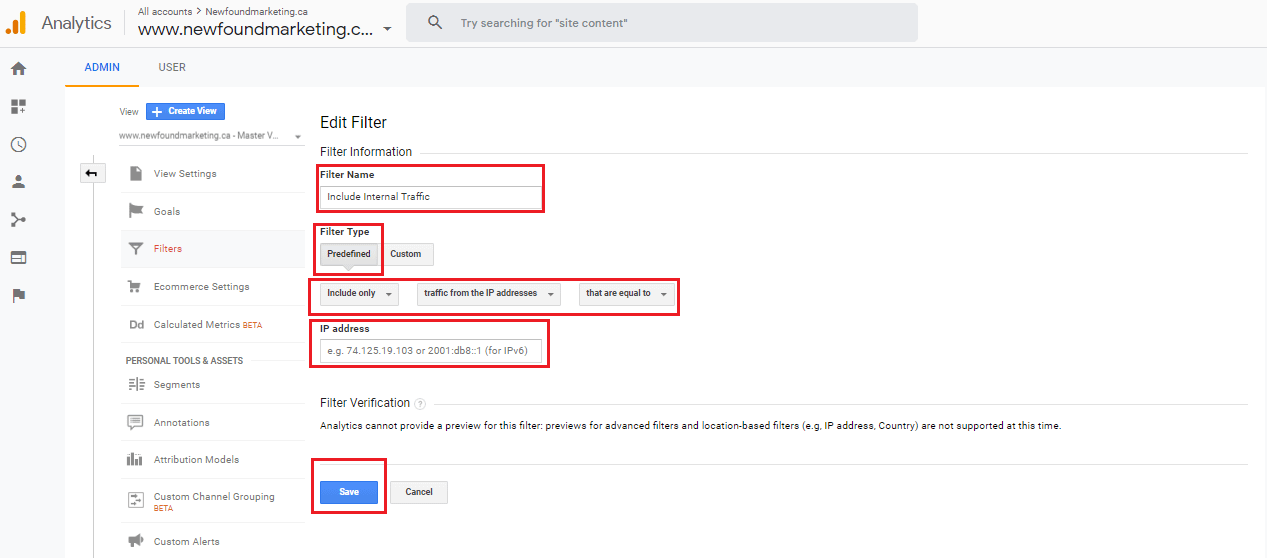
Include Internal Traffic – This filter is the exact opposite of the first one, and is used more in testing environments. It will remove all traffic generated from outside your organization, and allow you to see only traffic from within it. This is useful if you have made a change to your site, and are testing to see the effects of that change.
- Admin -> Filters -> Add Filter -> Give it an easily identifiable name -> Predefined -> Include ->Traffic from the IP addresses -> That are equal to -> Your organization’s IP address
Include Country – The internet is a big place, with people all over the globe potentially coming to your website. But what if you don’t sell to customers outside of Canada? You don’t want to block people from coming to your site, but you also don’t want their traffic being added to your reports since they are not part of your target audience. The easiest way to remove that traffic is to create a filter that shows only traffic originating from Canada.
- Admin -> Filters -> Add Filter -> Give it an easily identifiable name -> Custom -> Include -> Country -> Canada

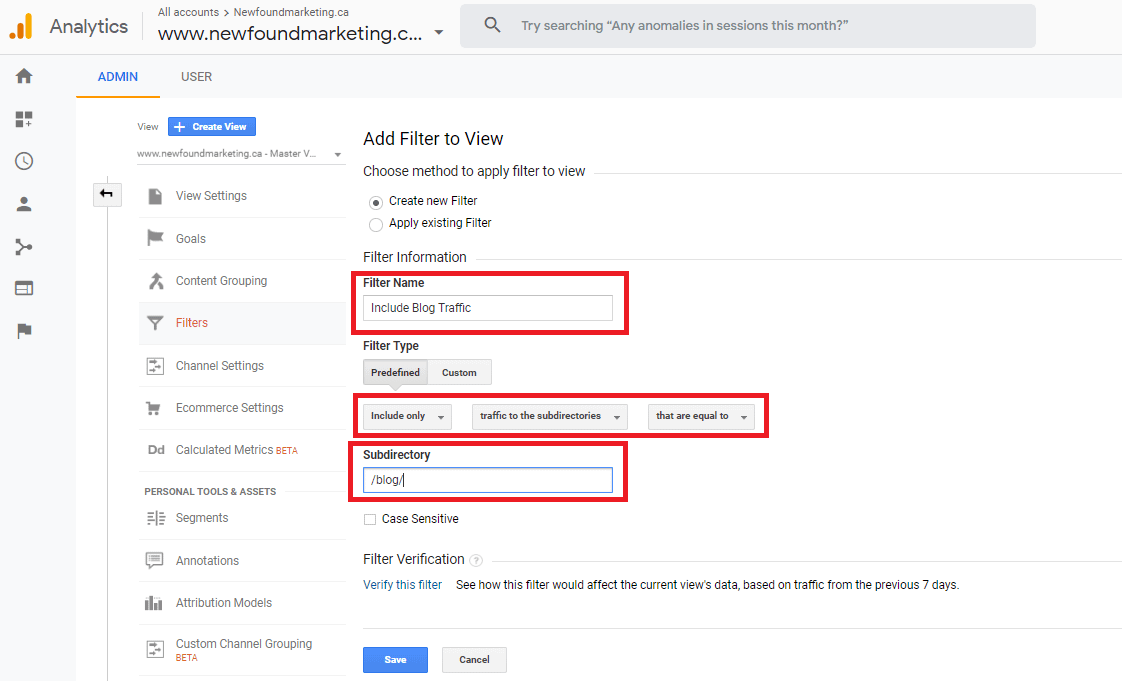
Include Blog Traffic – Your website is probably comprised of multiple pages, including your homepage, about page, contact page, etc… If you are interested in seeing traffic to only a particular page, you can create a filter that shows exactly that. This can be useful for isolating traffic to your Blog page.
- Admin -> Filters -> Add Filter -> Give it an easily identifiable name -> Include -> Traffic to the subdirectories -> /blog/
Assign Filters to a View
Once you have at least one filter set up, it’s time to apply that to a view. A view is a collection of one or more filters, allowing you to segment the Google Analytics data precisely, and narrow its focus. IMPORTANT NOTE: The default view All Web Site Data is an unfiltered view of all the raw data collected by Google Analytics and should not be modified or deleted. You may very well want to compare this data to your filtered data at some point, so best to leave untouched.
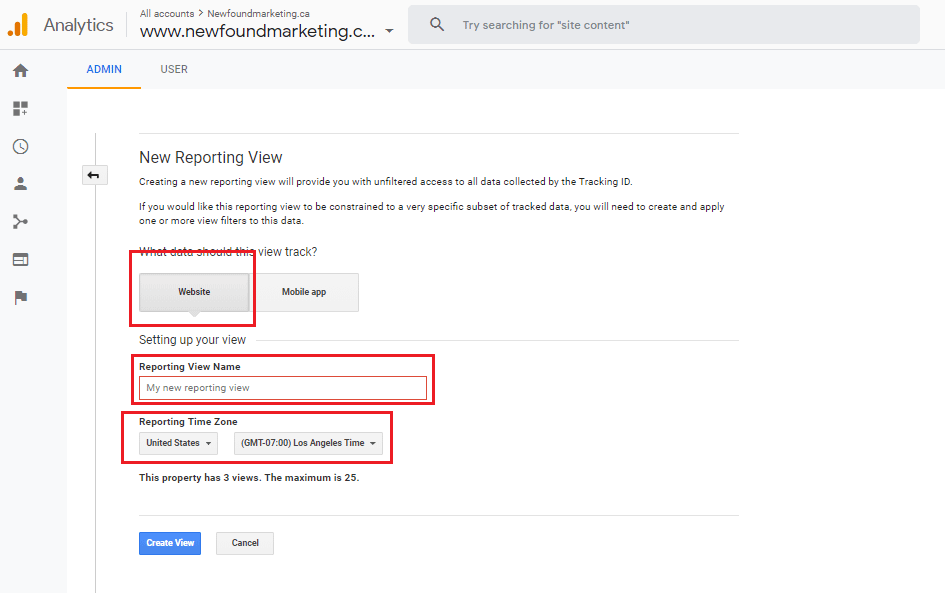
To create a view, start in your dashboard panel and click Admin, then Create View.
Assign your new view a descriptive name, and set the time zone preferences. Then Create View.
Your new view should now be listed in the dropdown at the top of the screen. You can use that dropdown menu to switch between different views. First, though, you will want to add at least one filter to this view. Simply click filters. This page will look familiar. It’s where you created the previous filters, except this time you click Apply Existing Filter, and then add one or more to the selected view.
Although you can create as many different views as you want, these three should be enough for most site admins:
- Test – If you are creating a new filter and want to try it out first before adding it to your main view, the Test view is perfect. Once you are satisfied with the filter’s performance, move it from the Test view to your main view.
- Unfiltered – This is a view of the raw data, and should not be modified or removed.
- Main – This is your primary view and should contain all your tested filters. Ideally, you should only see traffic that is 100% relevant to your goals.
In Conclusion
Google Analytics can be very overwhelming if you are trying to sift through the massive amount of data provided. The best way of reducing this to a manageable level is to create filters that block out unnecessary data, and highlight only the relevant traffic.
Interested in learning more about Google Analytics and how you can use it to help grow your business ask me about my Google Analytics Training
Find Me on Social Media
Twitter – https://twitter.com/Sheldon_Payne
Facebook – https://www.facebook.com/sheldon.payne/
Instagram – https://www.instagram.com/sheldon.payne/
YouTube – https://www.youtube.com/user/PaynesBrain
LinkedIn – https://www.linkedin.com/in/sheldonpayne/